Semi-Auto Reset: A Faster Way to Reset Your Pulley System

Semi-Auto Reset

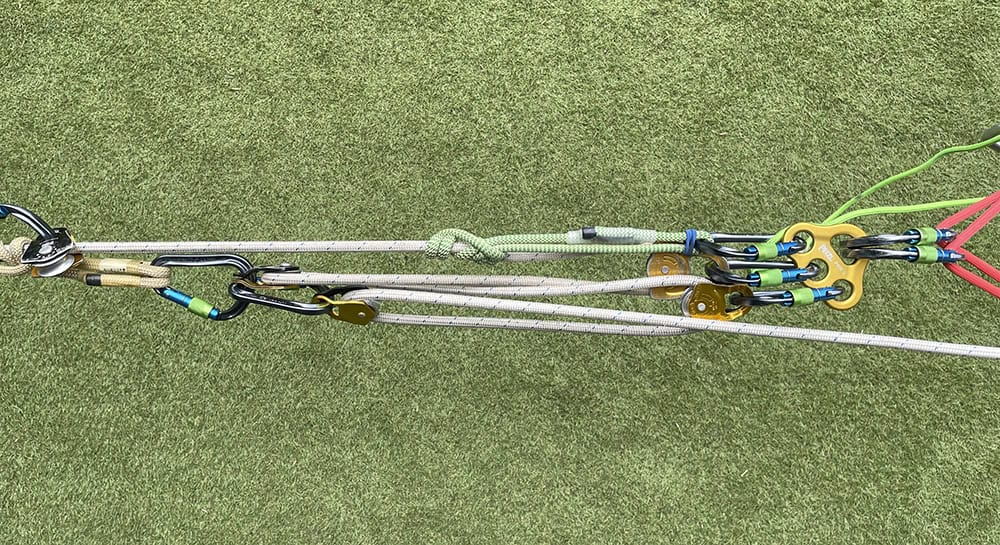
Resetting a pulley system in rope rescue can eat up time and limit your throw length. This post covers the Semi-Auto Reset — attaching a cord to the travelling pulley’s rope grab so an edge person can reset the system multiple times faster than walking it out. It covers cord sizing, compatible devices and Prusiks, pulley options, and troubleshooting twists and friction.

Context

This post is about small team rope rescue, where 3-4 people are hauling a patient up a vertical bit of ice, snow, rock, cave, or canyon.

Resetting the pulley system can be time-consuming in the rope rescue operation. It got me thinking about doing the pulley reset more efficiently.

Compared to often struggling with the reset, this methodology can be several times faster, and your throw length (the distance you can set the pulley system) can be much longer – therefore, fewer resets.

Resetting over rough terrain that is hard to walk or out into space at a directional can be achieved.

I have found it effective and efficient in recent training courses. We have tried this with rescuers and teams in real environments.

Let’s get into it.

The Semi-Auto Reset

What is it?

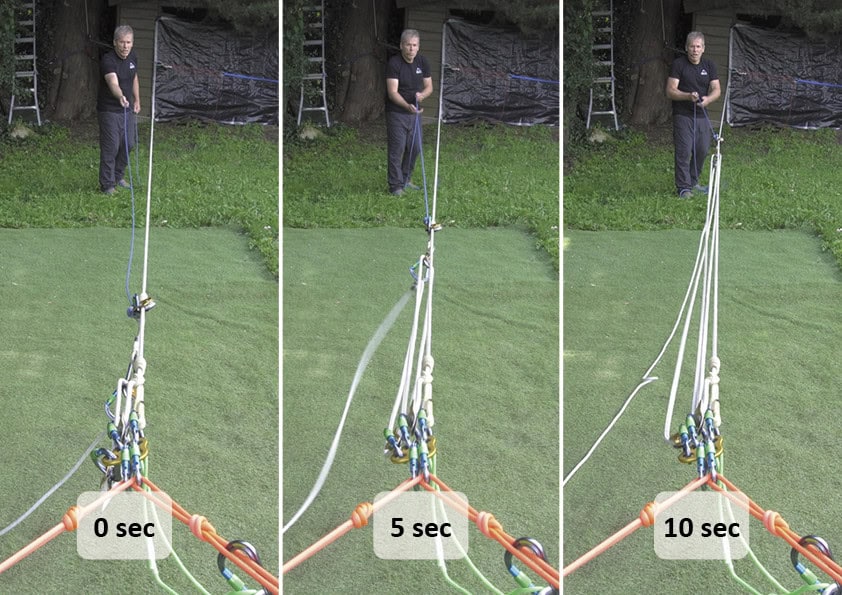
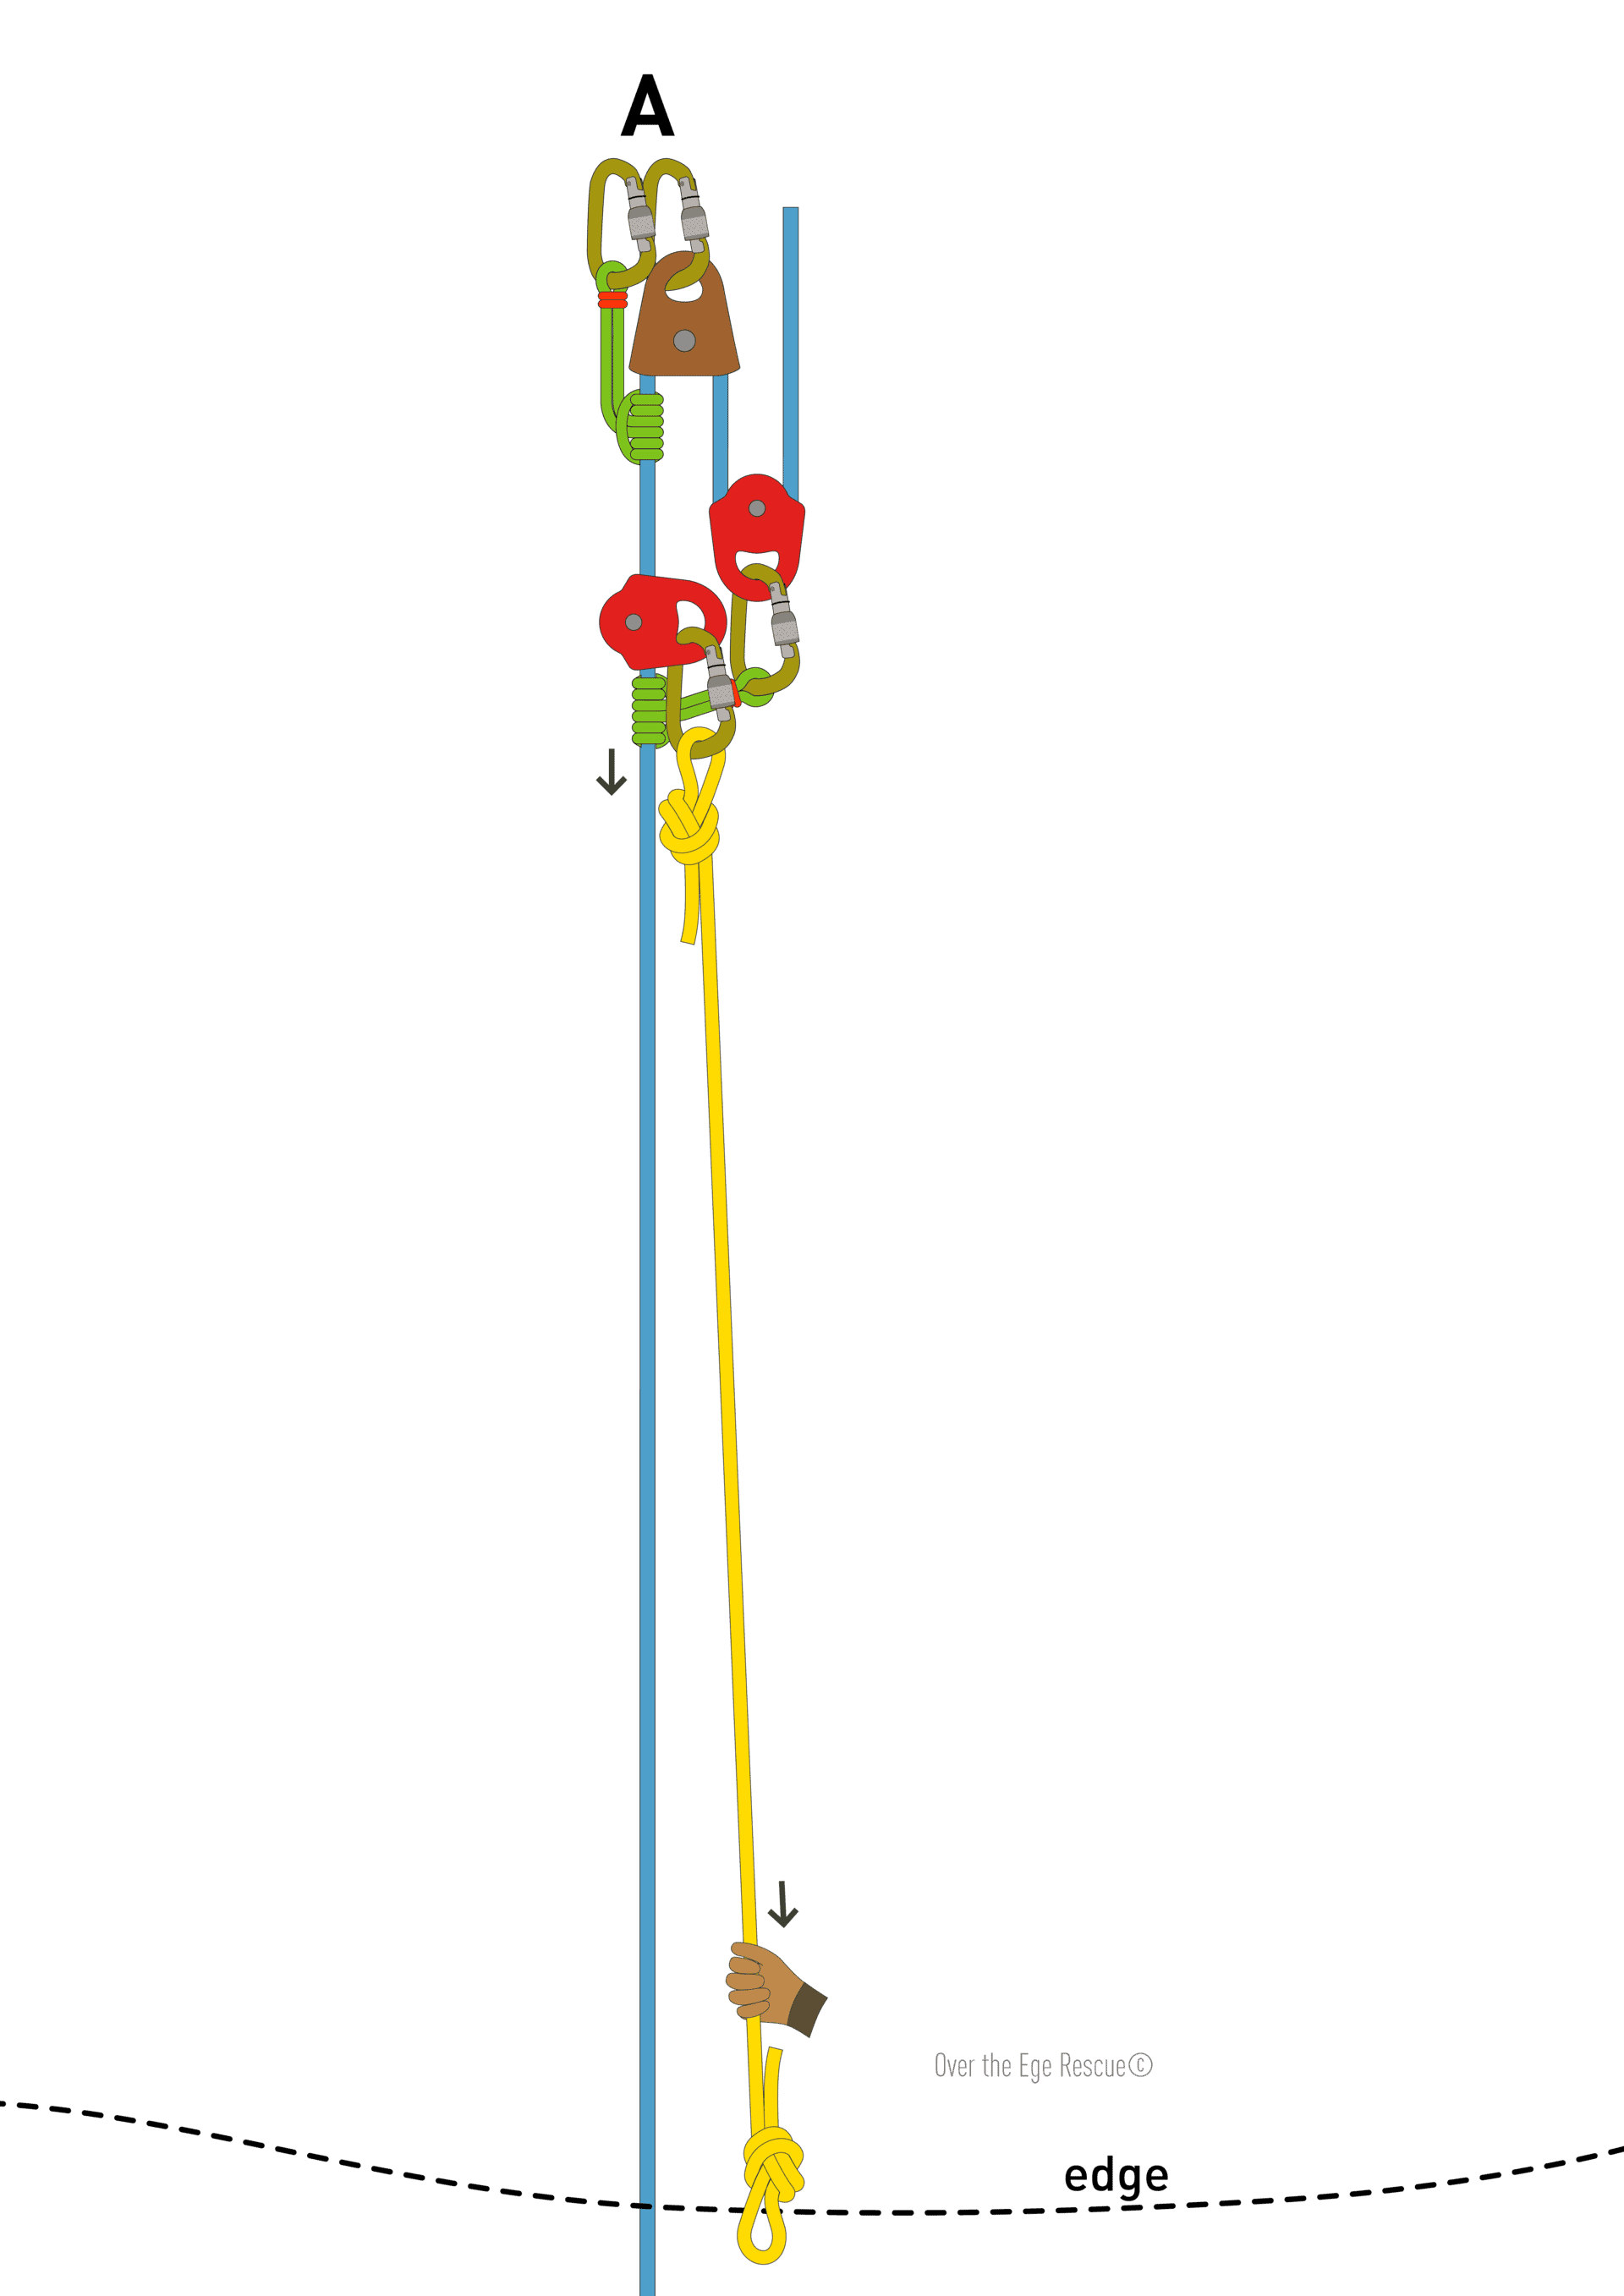
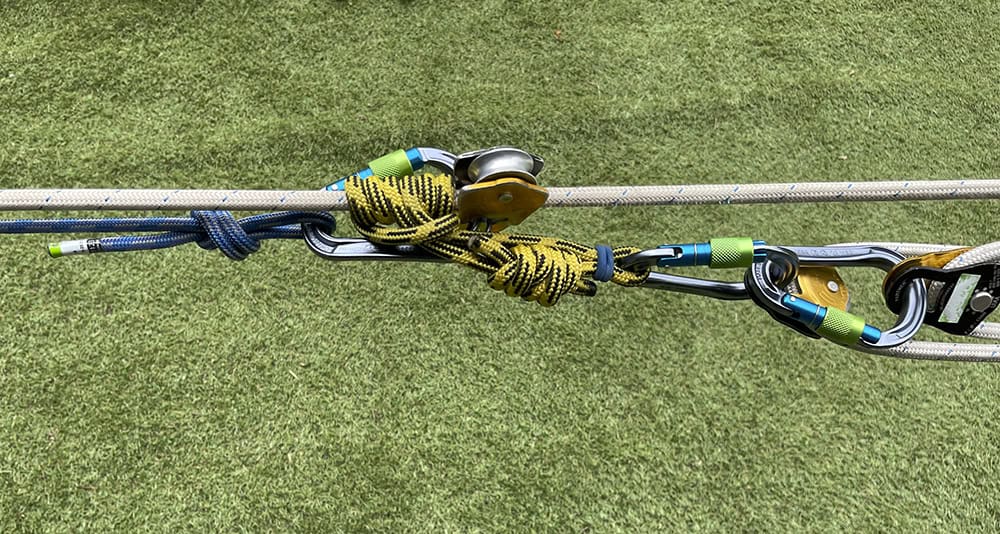
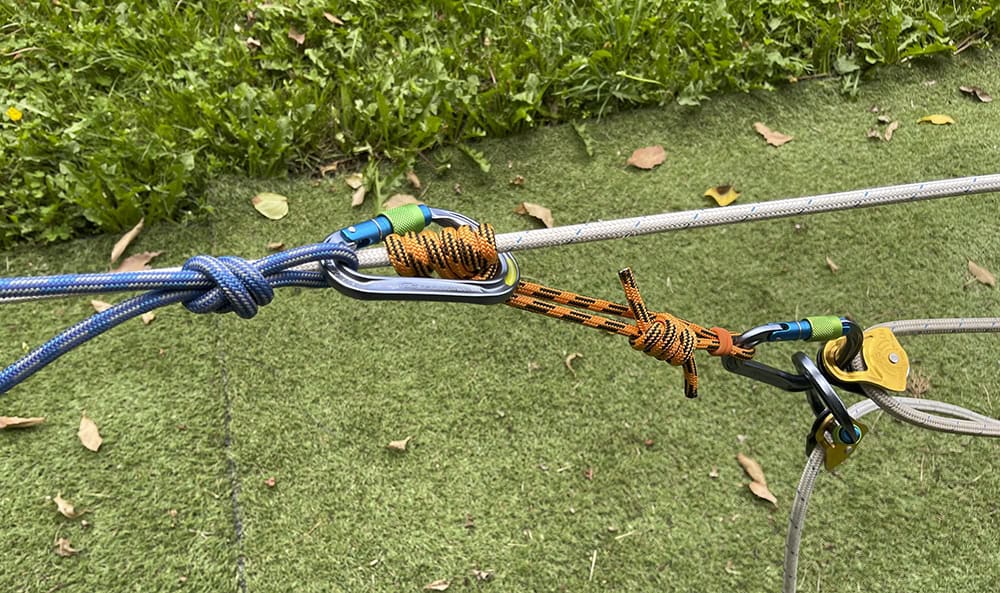
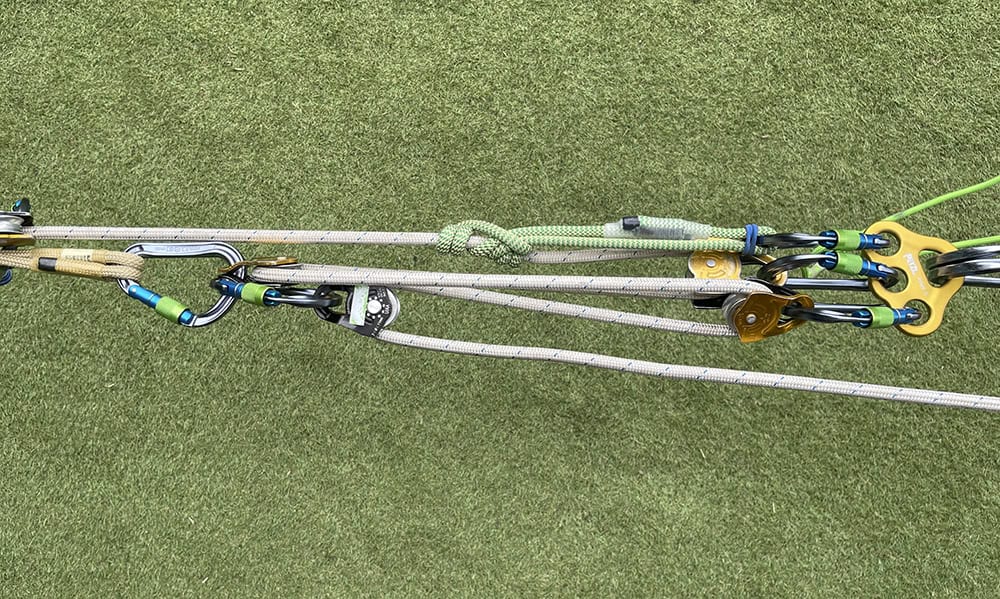
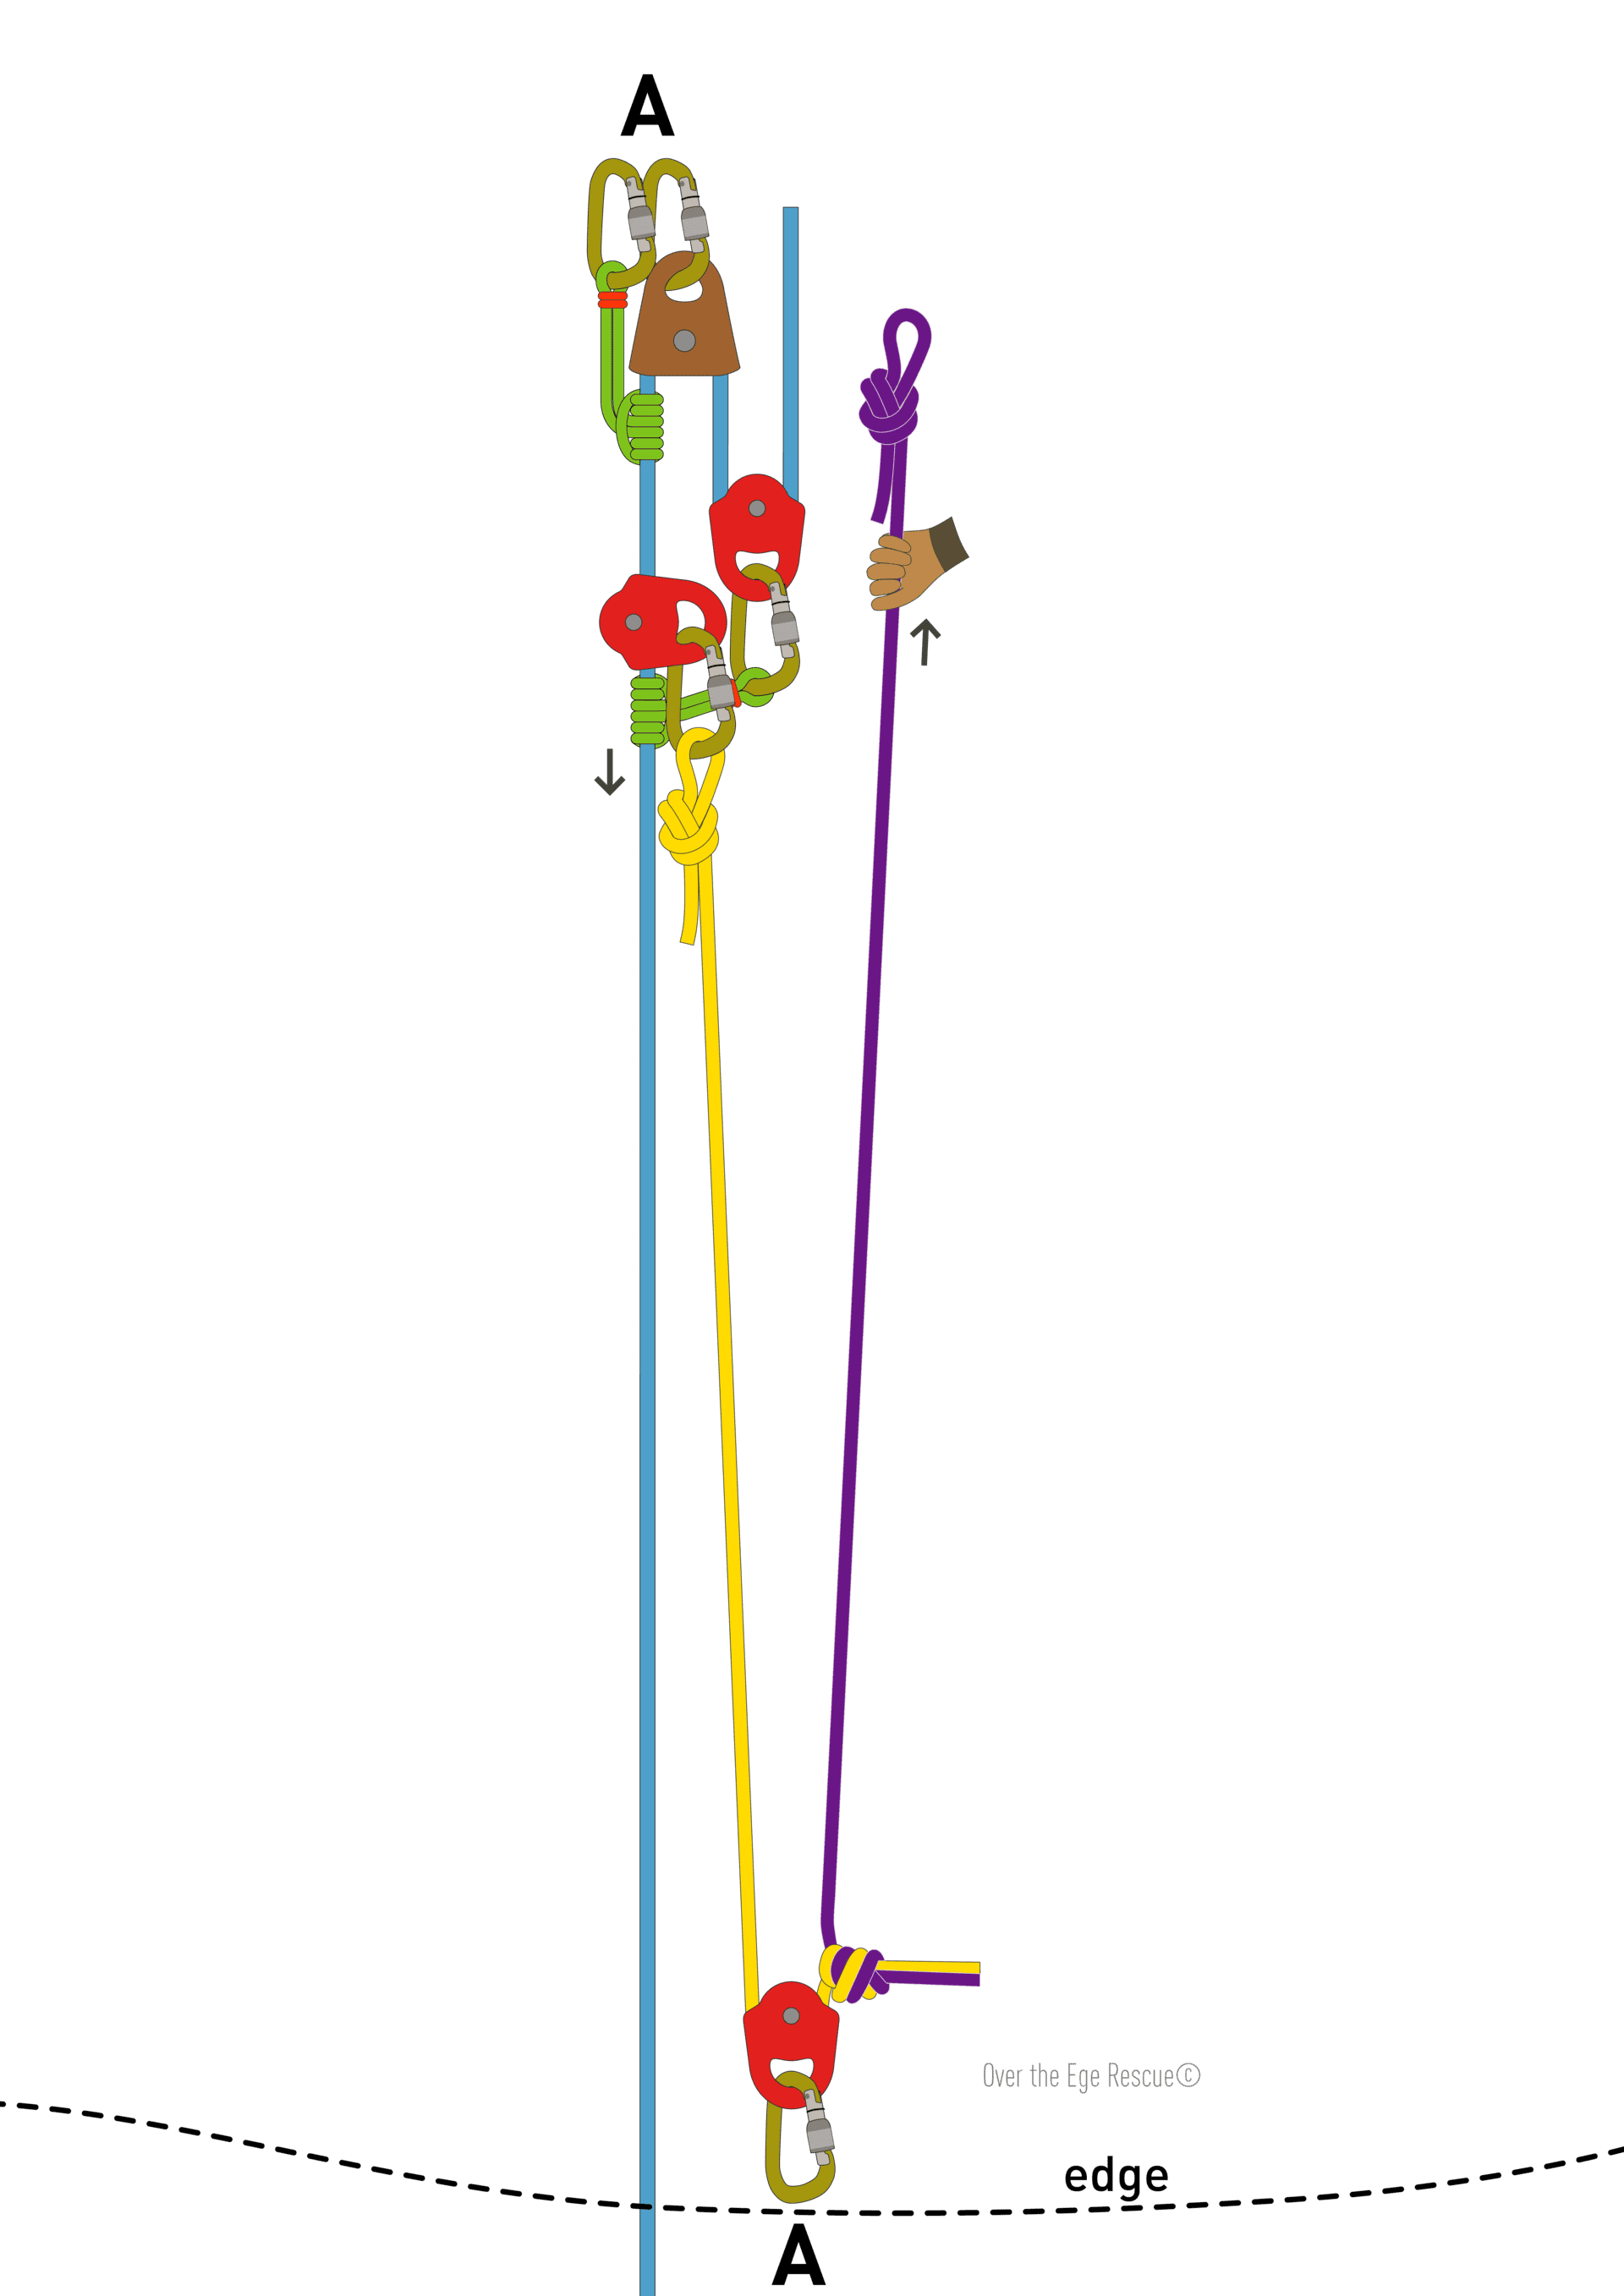
In its simplest form, the Semi-Auto Reset is a cord (e.g., 10m x 7-8mm) attached to the rope grab of the first travelling pulley. An edge person pulls on the cord to reset the pulley system.

Semi Auto Reset
Semi Auto Reset
Edge person reset
Edge person reset

Reset cords

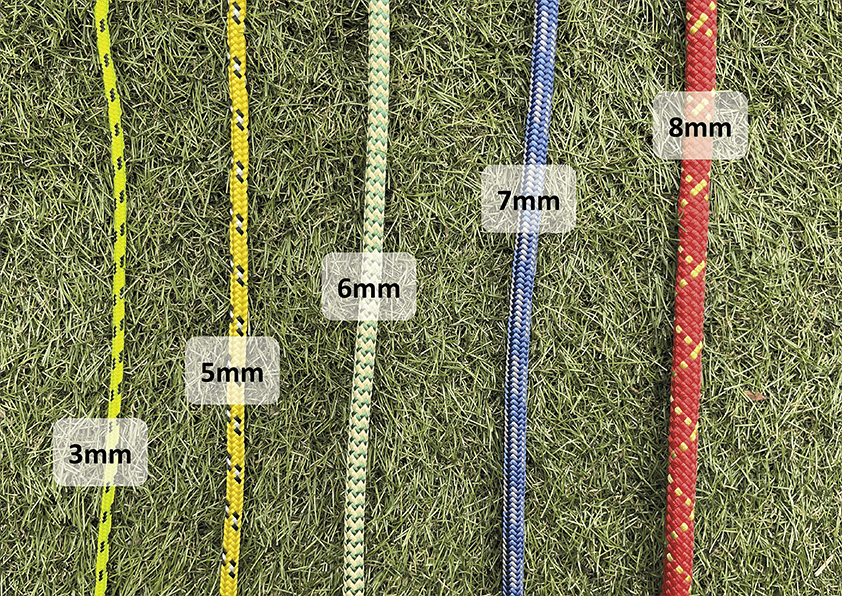
Reset cords 7-8mm are most effective. We have tried smaller diameter cords (6mm, 5mm, and 3mm) and found they work but are harder to grip. 

Cords for reset
Cords for reset

Mechanical Devices

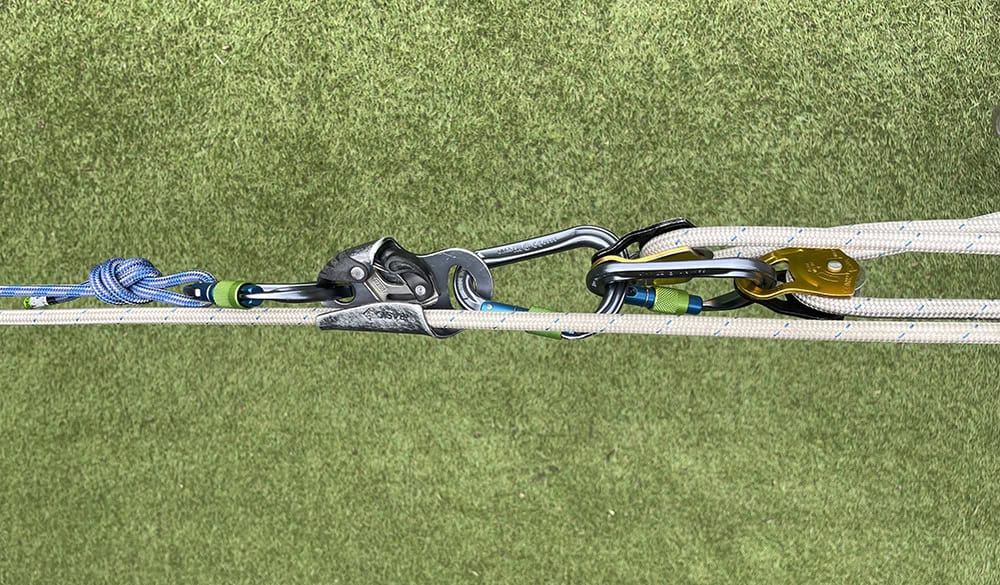
Attach the reset cord to the attachment carabiner or the rope grab and pull for mechanical devices such as a Petzl Shunt, Petzl Tibloc, or toothed ascender (e.g. Petzl Basic).

Tibloc for reset
Shunt for reset
Shunt for reset
Basic for reset
Basic for reset

Prusiks

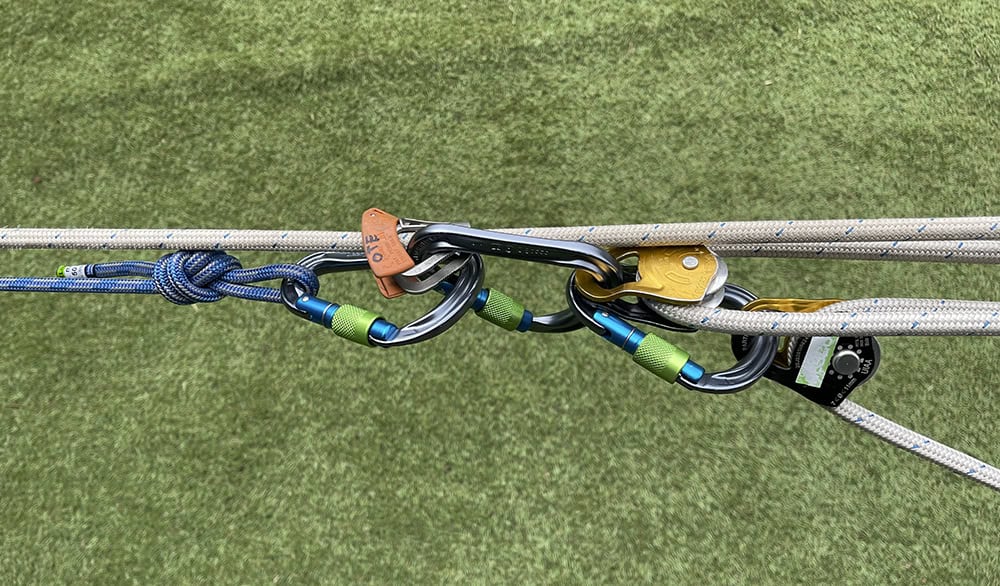
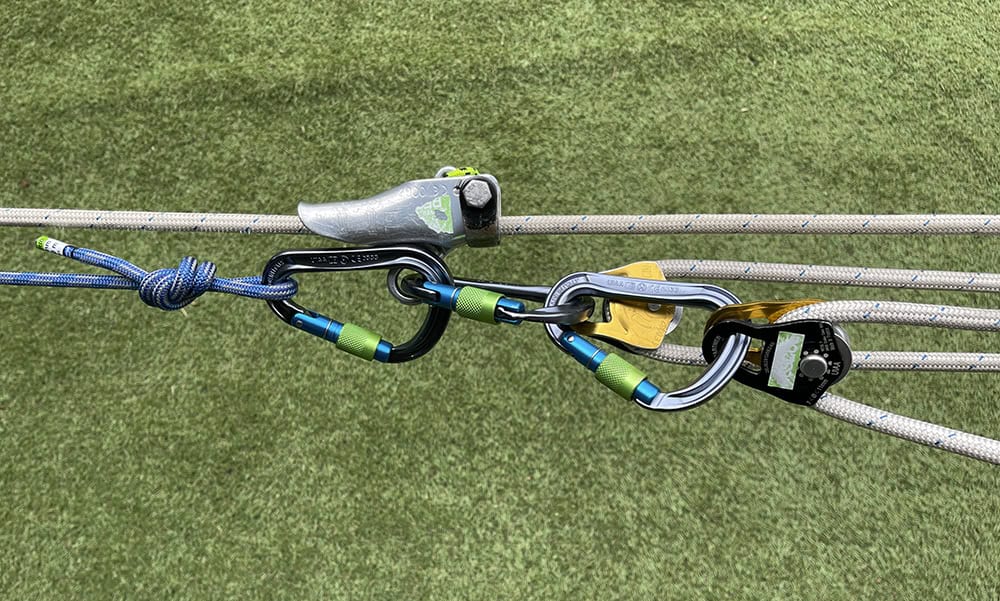
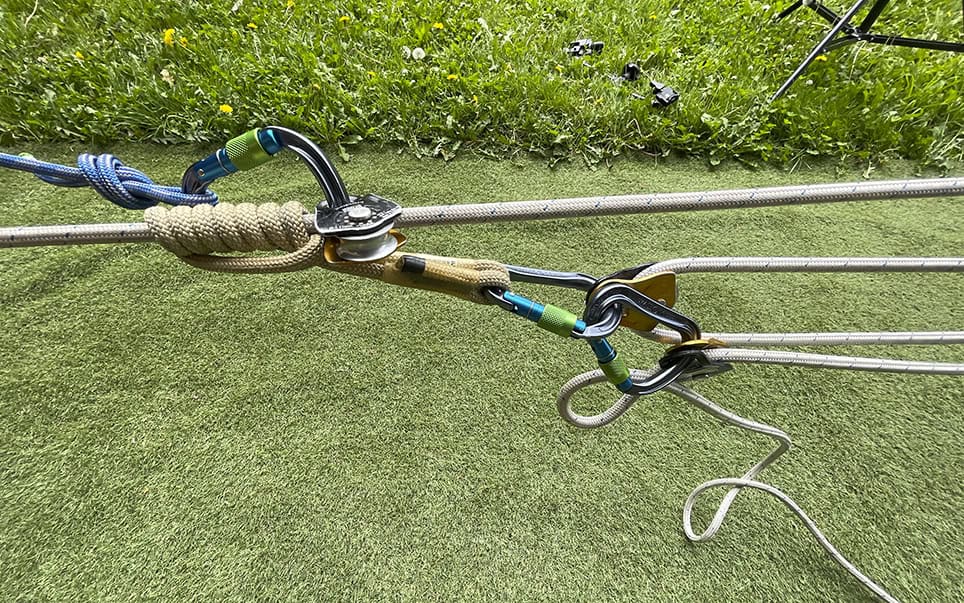
For Prusiks—e.g., 3 wrap (3on3) or VT style 6on1 Swabish—you can’t just attach and pull on a cord as the rope grab grips. Add a pulley around the tensioned line behind the Prusik (to ‘mind’ it) and attach the pull cord. Almost any pulley would do small/ large Prusik Minding Pulley (PMP) or not (see testing below). You can use a spare in your kit, or I often use a small personal pulley from my harness, e.g. a Petzl Partner (shown below).

Notes

  • Before reset, have a person on the haul team loosen the haul Prusik.
  • The VT style 6on1 Swabish seems easier to reset than the 3on3 (3 wrap) Prusik. The reset pulley loosens only one coil on the 6on1, which is easier than loosening the three coils on the 3on3.
3 wrap Prusik reset
3 wrap Prusik reset
6on1 VT Prusik reset

Pulleys

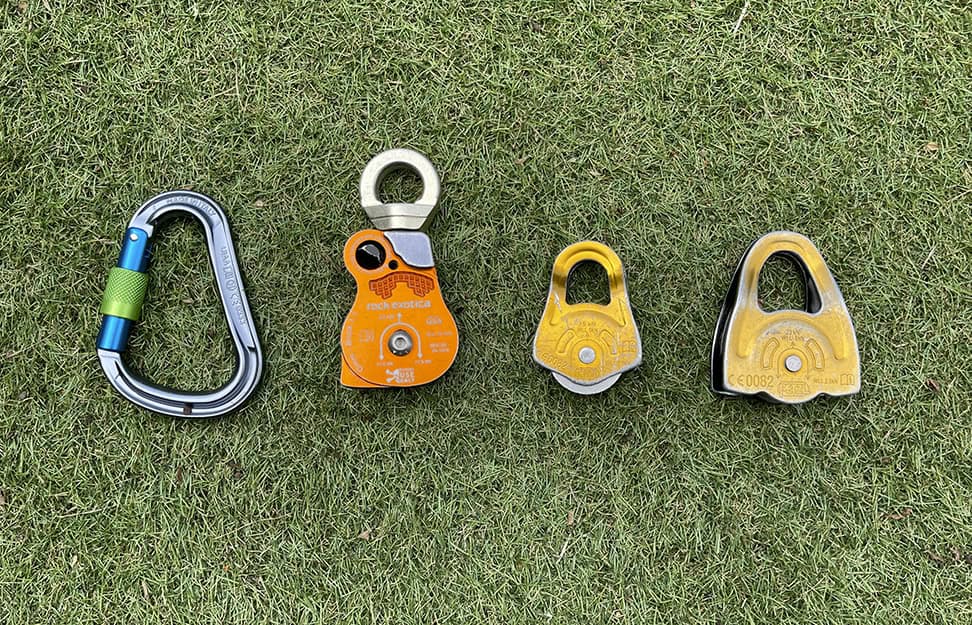
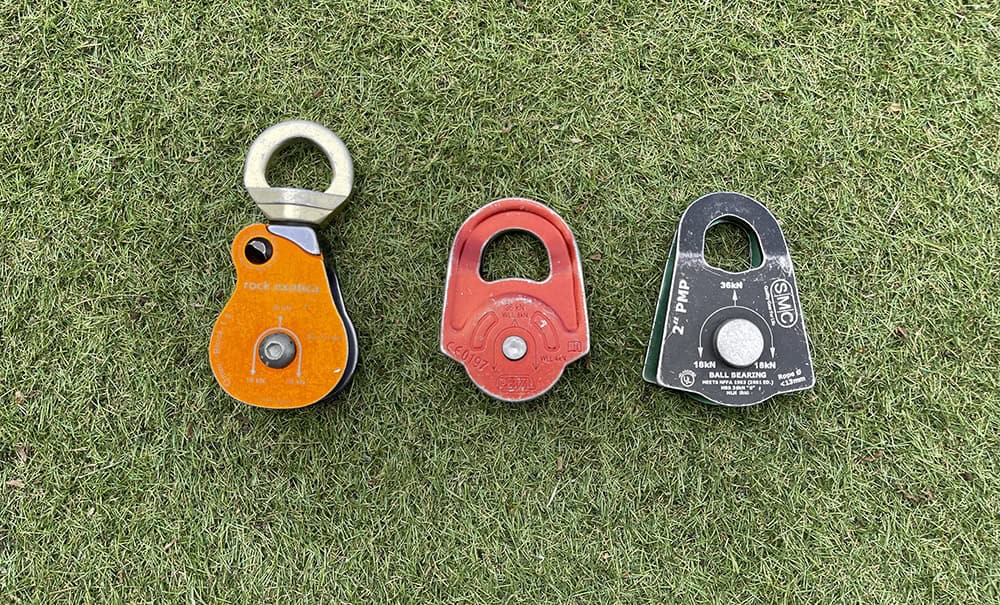
We tested resetting with the following pulleys:

Small pulleys

  • Rock Exotica Omni 1.1 28mm,
  • Petzl Partner 25mm,
  • Petzl Mini Minding 25mm) and a
  • Carabiner
small pulley for reset
Small pulleys for reset

Larger pulleys

  • Rock Exotica Omni 1.5 38mm,
  • Petzl Rescue 38mm,
  • SMC PMP 50mm
large pulleys for reset
Large pulleys for reset

Results

All pulleys tested worked on 10mm rope with 6, 7, and 8mm Prusiks, whether small or large, Prusik Minding Pulley (PMP) or not.

The Rock Exotica Omni pulleys didn’t work as well as the others tested. They don’t mind the Prusik very well but are more challenging to pull, so they are not recommended.

We have also tried clipping a carabiner over the top of the Prusik (see below). This method works sometimes when there is tension in the pulley system, but not always, so it is not recommended.

Before you use the semi-auto reset with the pulleys/Prusiks you use, test them to make sure they work.

Carabiner for reset
Carabiner for reset

Tips and tricks

Twist and bind

Sometimes, the rope gets twisted and binds on the travelling pulleys. Try these things:

  1. Pulling the reset cord slowly and steadily can give the haul rope time to untwist itself.
  2. The haul team needs to monitor and give the rope a quick flick to untangle it during reset.
  3. The rope can have a mind of its own and may need flaking in a pile to eliminate the twists before a reset. Start from the pulley system end, with the rope in your hands, and move the twists out the end.

Too much friction

Ensure the pulley system is running freely and has no twists.

The haulers need to make sure they don’t add friction to the rope. Usually, letting go of the rope works. Remember that the MA works in reverse; if the haulers hang on, the resetter has to pull much harder.

Twists extra fricton for reset
No twists running free for resets

Maximising reset

Consider a reset redirect if no one is at the edge or you want to maximise the throw, e.g., to a directional pulley in free space you can’t reach. You redirect the pull cord so the haulers can reset. You may need a longer reset cord, e.g., 2x 10m cord tied together. Make sure you hang on to the end of the haul rope when resetting into free space, as it’s easy to loose contact with it.

Redirect at an edge hauler reset
Redirect at an edge for hauler reset

Summary

  • The Semi-Auto Reset is multiple times faster to reset the pulley system than walking it out.
  • It is more efficient with fewer resets, as you can get a longer throw and access places you wouldn’t previously be able to.
  • You need a 10m x 7-8mm pull cord and a pulley for a Prusik reset.
  • You need an edge person to reset or redirect the cord at an anchor on the edge so the haulers can reset.
  • Pull the reset cord slowly and steadily. Ensure there are no twists in the rope and pulley system that could bind and increase friction. The haulers need to let go of the rope when resetting.

Bonus Material

For more detailed information: 

Rope Rescue & Rigging Field Guide (3rd edition)

for cave, canyon, alpine and rock

Provides easy-to-reference practical reminders on essential field techniques for teams and individuals training and responding to rope rescue incidents. 200+ pages, 250+ drawings, A6 size, waterproof paper

Disclaimer

SUMMARY: This post is not an instructional guide. Use at your own risk. We assume no responsibility or liability for any errors or omissions. Any testing undertaken was under controlled conditions with a limited set of equipment. The views, information, or opinions expressed in the post are solely those of the author. For the full disclaimer, click HERE

Related Posts

webbing anchor header
Anchors

Is 16mm webbing strong enough for rescue?

The post tackles a practical question for backcountry rescue teams: is 16mm tubular webbing strong enough for anchor rigging, given the appeal of reducing weight in a rescue kit? To find out, the team ran a series of pull tests comparing different wrap-and-pull configurations — Wrap 1 Pull 1, Wrap 2 Pull 2, Wrap 2 Pull 1, and Wrap 3 Pull 2 — across several real-world surfaces: pins, carabiners, smooth rock, sharp rock, and edge-protected sharp rock. A baseline was first established using 25mm webbing before switching to the thinner 16mm webbing to see how it held up.
Read More »
Friction

Does a smaller radius have more friction?

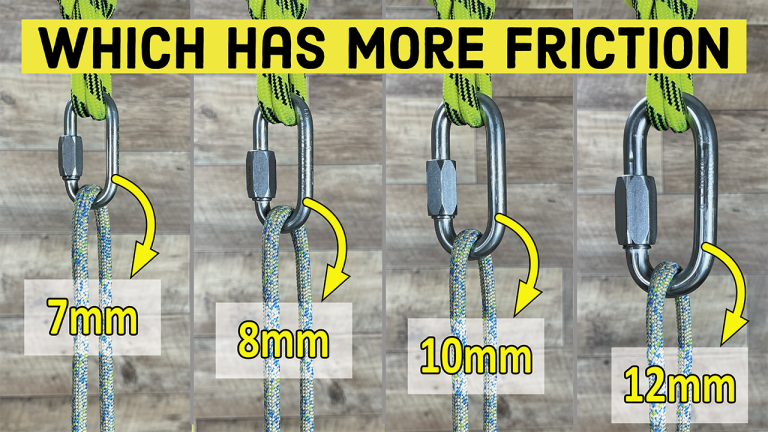
The post tackles a common assumption in rope work: that a smaller-radius device — a carabiner, mallion rapide, or belay device — produces more friction on a rope than a larger one, since the rope is thought to have more internal resistance as the radius decreases. To find out if this holds up, the team ran friction tests comparing stainless steel mallion rapides at 12mm, 10mm, 8mm, and 7mm, all using the same 8mm static rope. The results are checked against the Capstan Equation, which doesn’t include radius as a factor in the first place.

Read More »

Get the
top 5 rescue
checklist

Moments away

Want to be ready for rescue?

Get clarity, organised and practised