The Complete Gear List for Lightweight Rope Rescue Setups

Lightweight Rope Rescue Setup

Building a lightweight rope rescue system means using gear you likely already carry on your harness. This post covers the essential kit — rigging plate, small pulleys, Prusiks, rope grabs, extensions, and lowering devices — plus how to set it all up for single or double-rope rescue across canyon, cave, alpine, and rock environments.

Context

This is the gear we use for back-country rescue situations, including Canyon, Cave, Alpine, and Rock.

Recreationalists, instructors, and guides will likely use single-rope rescue for on-the-spot rescue. Organised rescue teams, on the other hand, are likely to use two-rope rescue, especially when they have a stretcher and an attendant.

The gear you bring on your harness should be enough (or close to it) to build a rescue system for a single rope. If you use a two-rope system, another person turns with the same gear, and now you have enough.

As we carry our equipment, we use (mostly) alloy gear that’s lightweight and portable. Even though the gear is lightweight, the breaking strength is more than enough, well over 20kN in most cases.

The equipment between disciplines is the same; however, for lowering, the device will be environment-specific for cave, canyon, alpine or rock.

Let’s get into it.

The gear list

Small rigging plate

A small rigging plate is the best way to organise the gear for your raising and lowering systems. The holes are spaced apart to allow the pulleys to be nested side by side and one on top of the other—for example, a four-hole Petzl PAW small (36kN, 60g). The Petzl PAW small (or similar shaped versions) is an excellent standard small rigging plate that I have used and know is very effective.

Alternatives include:

  • The five-hole Camp Multi Anchor 5 (30kN, 70g). Adding a second hole at the back can help by separating rigging systems and making the plate more balanced (i.e., it has less swing) when the load is transferred to the outside holes of the plate. 
  • The Grivel VLAD (30kN, 90g) combines a carabiner and a rigging plate. From experience using this, the pulleys do nest nicely together. However, the orientation may not be suitable for rescue, and you might have to add an extra carabiner. I include this for Canyon Rescue, as I already have it on my harness as a master anchor point. Check out the post, VLAD to help to get more insight and testing on using this as a master anchor point.
  • The BMM Bat Plate XS (36kN, 37g): its main feature is tiny and light. When I have use it I have found it to be effective. The front three holes are close together; however, as the middle hole is in front of the back two, pulleys can be nested without issue. The small holes do not allow carabiners to be rotated past a screw gate.
Petzl PAW S 36kN 60g
Camp Multi Anchor 5 30kN 70g
Grivel VLAD 30kN 90g
DMM Bat Plate XS 36kN 37g

Small pulleys x3-4 

For a start, you need pulleys with high efficiency, so something with a ballbearing sheave is ideal. Even though they are small, Petzl says the partner (15kN, 56gms) is 91% efficient, which is excellent. Also, as part of the pulley system and not taking a full load (e.g. 2/3s the load as part of a 3:1), 15kN minimum breaking strength is sufficient while keeping a high margin.

Having separate pulleys (rather than ones integrated into a carabiner) allows you to:

  1. Match with carabiners you already have (i.e. carry less gear).
  2. Group multiple pulleys on one carabiner when you are not using them (i.e. carry less gear)
  3. Stack pulleys to form additional mechanical advantage (an efficient way of rigging) – see the picture below.
Petzl PARTNER 15kN 56g
Stacked Pulleys
Stacked Pulleys

Small Prusik Minding Pulley

As with small pulleys, you need high efficiency with a ballbearing sheave.

Different brands, such as Petzl MINI (23kN 80g) and Rock Exotica MINI (30kN 83g), are suitable. These pulleys have a square face to prevent the Progress Capture Prusik from being sucked into the pulley and jamming or rotating around to the wrong side.

Petzl Mini PMP
Petzl MINI PMP 23kN 80g
Rock Exotica Mini PMP 30kN 83g

Progress capture Prusik

To pair with your Prusik Minding Pulley (PMP), you need a progress capture Prusik. For rescue work, we extensively test the progress capture Prusik to ensure it can catch a falling load. It, therefore, needs to be a soft material that grips around the rope, doesn’t strip the sheath and performs appropriately. What you use will depend on the rope and cord and the load. The progress capture falls into two categories:

The Prusik loop

The traditional option is an 8mm Nylon accessory cord. Find a cord with a soft sheath that performs well on a 10mm rope, such as an 8mm Kordas Nylon accessory cord (16.1kN).

One drawback of using a Nylon Prusik is that it can melt and fail when drop-tested with larger loads and rope with less stretch. A solution is to use a heat-resistant material in the Prusik’s sheath. Many cords now available in the arborist world perform well. For example, we have tested the Teufelberger 8mm Polyester/Aramid sheath with a Polyester core cord (22kN). 

Some prefer the loop because it is simpler: You only need to tie a 3-wrap (3-on-3) Prusik.

Load Capture Prusik Loops

The VT Prusik

Originally from rescue, it was adopted by canyoners and now by many other disciplines, such as arborists. VT stands for Voldotain Tresse, a specific type of friction braid.

This type of Prusik has sewn eyes on each end and is made with a heat-resistant cord on the sheath. For example, an 8mm Bluewater VT Prusik Technora sheath/nylon core (29.5kN) or the 8mm Aspiring Arborist Sewn Eye Prusik (VT) kevlar/polyester sheath/Dyneema core 22kN. 

You need to tie a 6-on-1 Swabish/asymmetric Prusik on the rope, as the traditional 3-wrap (3-on3) does not work well enough.

It has a soft sheath, so an 8mm performs well on a 10mm rope. If you use ropes smaller than this, a 7mm version is needed.

BlueWater 8mm VT-Prusik 29.5kN
Aspiring 8mm Arborist Sewn Eye Prusik (VT)
Aspiring 8mm Arborist Sewn Eye Prusik (VT) 22kN

Rope grabs x2

Single person loads

Use whatever you have on your harness for single-person loads, such as a 6mm Prusik loop, Tibloc, or hand ascender. The mechanical devices are more aggressive on the rope, but they are suitable as the load is only a single person.

Petzl Basic
Petzl TIBLOC
Petzl TIBLOC
Aspiring Prusik 6mm 14kN

Two person loads

When hauling two-person loads, stick to something that will slip along the rope first without damaging the sheath, such as an 8mm Prusik or Petzl Shunt.

Single 8mm Prusik
Single 8mm Prusik
Petzl SHUNT
Petzl SHUNT

Long and short extension

Long extension (60cm)

The long extension is to get the lowering device sufficiently in front of the Progress Capture Prusik. It can be a specific piece of sewn sling (or cord) 60cm long with two locking carabiners or improvise with a longer sling, for example, a 1.2m sling halved. The longer sling approach is messy but will get the job done.

Long Extension Lightweight Rescue

Short extension (20-30cm)

The short extension is for changeovers on a single rope. You could use a 22cm quickdraw or a short Prusik loop.

Short Extension Lightweight Rescue

Lowering device

This will be whatever friction device you have with you, such as a canyoner’s figure-8 device, climber’s belay device, or caver brakebar rack, OR a specialist rescue lowering device such as the scarab.

These devices can be configured to have sufficient friction depending on the load. More friction is not necessarily better. For more information, check out the post on how much friction for your device.

The brakebar rack and scarab are made of stainless steel, which is much more abrasion-resistant; however, they are heavier than the other devices made of alloy. It’s about choosing the most suitable device for your environment and considering how much you need to use it.

There is a difference when you slow-pull test the device in front of a Prusik behind on a 10mm rope (the rope breaks at the device):

  • Scarab: 20kN with an 11mm rope
  • Petzl Reverso: 15kN with a 10mm rope
  • Petzl Huit: 18kN with a 10mm rope
  • Aspiring Brakebar Rack: 18kN with a 10mm rope
Petzl REVERSO
Petzl REVERSO 57g
Petzl HUIT
Petzl HUIT 100g
Conterra ScarabTi 27kN 385g
Aspiring Brakebar Rack
Aspiring Brakebar Rack 27kN 265g

Locking carabiners x10

While this seems excessive, it is not extra; it is just what you have with you and whatever additional carabiners are needed to make the lowering and raising system work.

For versatility (meaning you can use them anywhere), the type I recommend is the small-sized and lightweight alloy HMS, such as the CT Warlock (56 grams) or the Grivel Delta (66 grams) with a screw lock. Other brands of similar size and shape would work equally as well. 

The screw lock is recommended as it’s easy to use and manipulate and doesn’t get clogged in cold, wet, snowy or dirty environments (compared to a triple lock).

Grivel Delta 25kN 66g
CT WARLOCK HMS 23kN 56g

The gear list will be in a link at the end so you know what you need.

That’s it for this section! In the next one, we’ll look at how to set all this equipment onto the rigging plate, which is ready for either a lower or raise.

The rigging setup

In this section, we’re going through the basic rigging setup for your lightweight system.

  • Set it up before the operation, so you have the gear ready and a plan.
  • Having both a lower and a raise prepared is an excellent strategy, as you can change from one to the other at a moment’s notice.

The first thing is you need an anchor system.

Next, we put carabiners into the anchor focal point and clip in the small rigging plate.

Rigging Plate into Anchor

We need a 60cm extension for the lowering device on the right-hand side or the left-hand side of the plate. The side you put the lowering system on on will depend on the direction you want to build your pulley system. For this extension, there are different options—you don’t have to have a particular sling here.

At the end of the extension, we install a lowering device appropriate for the environment—in this case, a belay device.

We will put a Load Capture Prusik at the top carabiner next to the plate.

Now put a carabiner in the plate centre hole, which is the redirect. This is all you need for a lowering system. Only put the things you will use on the plate. Clip pulley system parts onto the anchor.

Lowering Overview

Let’s continue and set up as if we are building a pulley system.

Next, the Prusik Minding Pulley (PMP) is clipped in the centre hole. The reason is that it’s in the centre; we found with experimentation that it’s nice and balanced. Otherwise, if the PMP is on the outside, the rigging plate swings when resetting the pulley system.

Next is a carabiner and pulley on the left-hand side for a change of direction.

Depending on the pulley system you intend to build, you will need a couple of extra pulleys and 1-2 additional rope grabs, such as a 5:1 simple as a minimum or even up to a 9:1 compound.

If we use the system on a single rope, we need a short extension, such as a quick draw.

Clip the extra pulleys/rope grabs and short extension on the anchor within reach. This keeps the area around the plate clean and allows you to grab the gear when needed.

Lightweight Rope Rescue Closeup

The gear list will be in a link at the bottom so you know what you need.

It seems like lots of equipment; however, for a lightweight rescue, you want to mostly use what’s on your harness, supplementing with a few other things you don’t usually have.

Lightweight Rope Rescue Gear Setup
For more detailed information: 

Rope Rescue & Rigging Field Guide (3rd edition)

for cave, canyon, alpine and rock

Provides easy-to-reference practical reminders on essential field techniques for teams and individuals training and responding to rope rescue incidents. 200+ pages, 250+ drawings, A6 size, waterproof paper

Final thoughts

What I have presented here is a starter kit. For a rope rescue, you need to add a few more things, such as edge protection, anchoring, ropes, and job-specific rigging.

Think carefully about the gear. Your biggest asset is skilled operators who can get the job done. Remember, one of your main priorities is ‘the patient’ and getting them to safety in a timely way.

They don’t care about how much equipment you have or how ‘technical’ your system is.

Grant Prattley at Over The Edge Rescue.

Bonus Material

See the attached download to see all the gear you need and the setup.

For more detailed information: 

Rope Rescue & Rigging Field Guide (3rd edition)

for cave, canyon, alpine and rock

Provides easy-to-reference practical reminders on essential field techniques for teams and individuals training and responding to rope rescue incidents. 200+ pages, 250+ drawings, A6 size, waterproof paper

Disclaimer

SUMMARY: This post is not an instructional guide. Use at your own risk. We assume no responsibility or liability for any errors or omissions. Any testing undertaken was under controlled conditions with a limited set of equipment. The views, information, or opinions expressed in the post are solely those of the author. For the full disclaimer, click HERE

Author’s Note: This post was originally published in June 2018 and has been completely revamped and updated for accuracy and comprehensiveness.

Related Posts

webbing anchor header
Anchors

Is 16mm webbing strong enough for rescue?

The post tackles a practical question for backcountry rescue teams: is 16mm tubular webbing strong enough for anchor rigging, given the appeal of reducing weight in a rescue kit? To find out, the team ran a series of pull tests comparing different wrap-and-pull configurations — Wrap 1 Pull 1, Wrap 2 Pull 2, Wrap 2 Pull 1, and Wrap 3 Pull 2 — across several real-world surfaces: pins, carabiners, smooth rock, sharp rock, and edge-protected sharp rock. A baseline was first established using 25mm webbing before switching to the thinner 16mm webbing to see how it held up.
Read More »
Friction

Does a smaller radius have more friction?

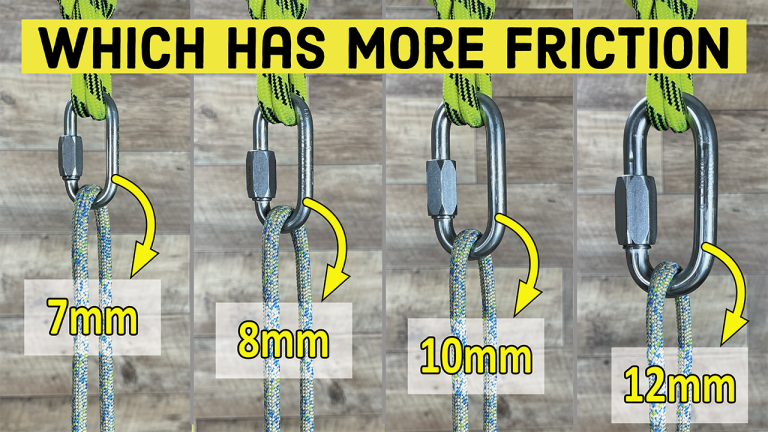
The post tackles a common assumption in rope work: that a smaller-radius device — a carabiner, mallion rapide, or belay device — produces more friction on a rope than a larger one, since the rope is thought to have more internal resistance as the radius decreases. To find out if this holds up, the team ran friction tests comparing stainless steel mallion rapides at 12mm, 10mm, 8mm, and 7mm, all using the same 8mm static rope. The results are checked against the Capstan Equation, which doesn’t include radius as a factor in the first place.

Read More »
Which has more friction One Carabiner or Two
Friction

Which Has More Friction, One Carabiner or Two?

With rope diameters trending smaller, there’s a common claim that two carabiners create more friction than one for a Munter hitch or a belay device like the Reverso. This post tests that claim across three stages: measuring the coefficient of friction directly, running slow-pull tests on different devices, and finally trying it out on a practical 10m abseil, using both round and frame-style carabiners.

Read More »

Get the
top 5 rescue
checklist

Moments away

Want to be ready for rescue?

Get clarity, organised and practised